mercoledì 29 agosto 2018

A seasonal happy birthday card for Sunny Studio!

Hello there! 
Today i'm up on the Sunny Studio blog with a Fall Happy Birthday card.


I love creating birthday cards with a seasonal twist and today i combined the new Happy toughts set with the Happy Harvest one to make my card.

First i created my card base out of white cardstock and i stamped my sentiment in the center, then i stamped, colored and die cut lots of sunflowers and leaves and composed my panel.


I glued down all the sunflowers with foam adhesive and all the leaves with liquid glue, i added some sequins and some details with a white gel pen to all my images.
Finally i created some dry embossed lines with my scoring board to finish my card.
I think it turned out pretty elegant and i'm really happy with it, the sentiment font is so beautiful that i wanted it to be the focal point of my card :)

I'm so super happy bout how it turned out, hope u like it too and thank you so much for stopping by today.

Please enjoy my Cardmaking Adventure on * Instagram*! I'll be posting all my little cards,tags and i also can't wait to see all the projects shared in the community! :)

See you soon with another cute project! :)
Have an amazing day! 
franci :) 

sabato 25 agosto 2018

More Halloween fun with Hello Bluebird!

Hello there and happy saturday!
Today i have a fun Halloween card made with lots of Hello Bluebird stuff from the new release :)


I love too cute to spook Halloween stuff, it's my kind of Halloween cause i don't like scary things at all and these ghosts are the cutest!! 
First of all i stamped all the images on to white cardstock with memento black ink, i colored them with copics and i die cut them all with their coordinated dies.


I used lots of Hello Bluebird sets: Halloween Fun, Ghostly Greetings, Spooky Script and Autumn Gatherings ( for the little glasses! eheh!!) 
I inked my background with Distress Inks Salty Ocean and Chipped Sapphire, i let i dry and i stamped the sentiment - love this fancy font so much!!


Finally i glued down all the images with foam tape - this design is my favorite to make and i'm so happy about how this turned out :)

Please leave a comment down below if u have any questions or just leave me some love :)

Please enjoy my Cardmaking Adventure on * Instagram*! I'll be posting all my little cards,tags and i also can't wait to see all the projects shared in the community! :)

See you soon with another cute project! :)
Have an amazing day! 
franci :) 

mercoledì 22 agosto 2018

"Sending Hugs" surprise card for Heffy Doodle!


Hello there and happy wednesday! 

Today i'm up on the Heffy Doodle blog with a "Sending Hugs" surprise card feat the Yappy Happy Mail set!


First of all i die cut 2 stitched panels out of white cardstock and i created a coordinated red card base. 
Then i placed my mail box stamp on to one of the panels and i stamped it in black. I also stamped lots of images from the same set, colored them with coics and die cut them with their coordinated dies. 


I colored my mail box and i partially die cut it to create a little "door" effect.I masked it and the bottom of my panel out with some tape and i colored my background by sponging some Peacock Feathers distress ink.
I also stamped my sentiment and then i glued down all th eimages on the front of my card with liquid glue and foam adhesive. Then i glued down all the other images on to my second panel and i placed them to show up once the mail box is open ( you can also trace with a pencil the mail box window on to the second white panel to help you with the placement).


Finally i glued my first panel n to my secon one and then i adhered everything on to my card base.
I also added some deatils to my images with a white gel pen :)


I'm so super Yappy Happy about how it turned out :)

Hope you like my card and thank you so much for stopping by today!

Please enjoy my Cardmaking Adventure on * Instagram*! I'll be posting all my little cards,tags and i also can't wait to see all the projects shared in the community! :)

See you soon with another cute project! :)
Have an amazing day! 
franci :) 

"You make me happy" shaker card for Sunny Studio!


Hello there and happy wednesday!

Today i'm up on the Sunny Studio blog with a fun shaker feat the new Comic Strip Everyday die.

I love this new die cause it can be customize very easily. If you die cut it, you'll have a beautiful frame with lots of little spaces to be decorated but if you are in a hurry and you need to make a quick shaker, you can cut with your scissors the internal partitions and you have a beautiful stitched frame!


That's exactly what i did for my card today. And it's also super easy to die cut foam with adhesive with the same technique so you can have all the elements to build your shaker. Instead you can use foam adhesive around the edges like i did.
Also you can create lots of mini shaker scenes leaving the die cut as it is, can't wait to create one card like that!
The little clouds are the ones included in the set, soo pretty! 


I also used the new Woodland Borders to die cut the grass out of this stripy green paper from the Dots & Stripes Jewel Tones 6x6 paper pad and the little gnomes are from the Home Sweet Gnome set. I stamped, colored and die cut them and then i adhered all my images on to the plastic sheet so they are actually out of the shaker. 
I built my sentiment with the Happy Toughts set and i embossed it in white. 
Finally all the shaker elements are sparkling clear sequins and glitters, i think they pop very nicely against my background colored with the Spiced Marmelade Distress Oxide Ink.

I'm so super happy bout how it turned out, hope u like it too and thank you so much for stopping by today.

Please enjoy my Cardmaking Adventure on * Instagram*! I'll be posting all my little cards,tags and i also can't wait to see all the projects shared in the community! :)

See you soon with another cute project! :)
Have an amazing day! 
franci :) 

lunedì 20 agosto 2018

Lawn Fawnatics Challenge 35!


Hello there and happy monday! 

It's time for a new challenge over at Lawn Fawnatics and the new theme is Coffee, tea & treats!


I was inspired to create a cute fun scene with lots of pumpkins, a couple of little squirrels and a cup of tea! 

Oh i love these cuties soo soo much! They make me so happy, the new season is coming :)

I also embossed my sentiment with the Lawn Fawn gold embossing powder and this effect is soo cool and pretty! 

Hope u like my card and thank u so much for stopping by :)
Be sure to have fun and play with us! 

Please enjoy my Cardmaking Adventure on * Instagram*! I'll be posting all my little cards,tags and i also can't wait to see all the projects shared in the community! :)

See you soon with another cute project! :)
Have an amazing day! 
franci :) 


domenica 19 agosto 2018

Boo! Halloween fun with Hello Bluebird!

Hello everybody and welcome back to my blog! 
Today it's all about Halloween Vibes and the "too cute to spook cuties" from the new Hello Bluebird Collection are the real stars of the show!
Let's start with my first project, i have 2 to show u today so grab a cup of coffe and get cosy :)


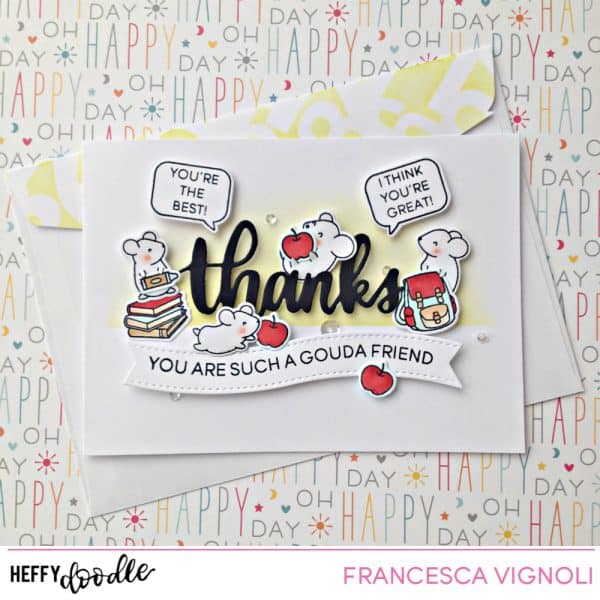
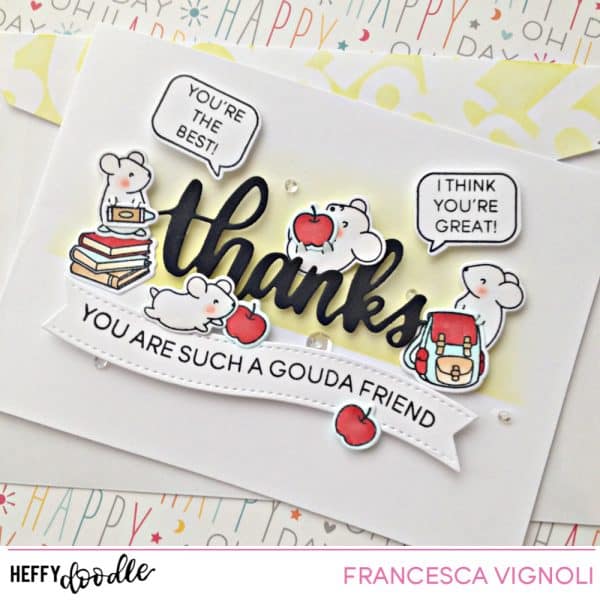
I'm in love with this little scene, that little bear with his caramel apple is just too adorable! 
First of all i die cut the Spooky Scene Die out of some dark kraft cardstock and I actually used Paper Bag cardstock by Lawn Fawn. I shaded the trees a little bit with the Walnut Stain Distress inks and the grass i die cut it out of white and colored it with Twisted Citron and Shabby Shutter + a little bit of Peeled Paint Distress inks.


I stamped, colored and die cut lots and lots of images from all these sets: Halloween Party, Halloween Fun and Ghostly Greetings. 
And omg i can't have enough of this little spider and its candies! ahah!!


I created my background by inking a white panel with Picked Raspberry, Abandoned Coral and Spiced Marmelade and i composed and glued down my scene as u see it. 
Then i stamped my sentiment from the Spooky Script set and i love this font, it's so pretty and elegant, it maches perfectly a fun and cute Halloween card.
I added some sparkle and little white details with a white gel pen and i can't stop looking at it! eheh!

Now.. on to my other project!
I created another card with the Trick or Treat set :)


I went Crazy Halloween with this, i mean a witch, a vampire and a little Frankestein?! they are soo cute!!! ahah!
First of all i created my card and this is actually a one layer card - i did glued my images down with foam tape but since no more layers are involved i consider this a s a 1 layer design :)
I colored it with Abandoned Coral, Dusty Concord and mostly Chipped Shappire distress inks, i die cut a stitched banner and i stamped my sentiment from the same set in black.


I glued down all the elements and btw i had to fussy cut my images cause dies are still on their way but coordinated dies are avaiable for this set as well.
Finally i added some white dots here and there to achieve a starry look for my background.
Oh i had soo much fun creating these and i hope u will join them as much as i do :)


Please leave a comment down below if u have any questions or just leave me some love :)

Please enjoy my Cardmaking Adventure on * Instagram*! I'll be posting all my little cards,tags and i also can't wait to see all the projects shared in the community! :)

See you soon with another cute project! :)
Have an amazing day! 
franci :) 

mercoledì 15 agosto 2018

Thanks, u're such a gouda friend card for Heffy Doodle!


Hi there!

Today i'm up on the Heffy Doodle blog with a card full of little happy critters!


These little hamsters/mouses from the Hello Squeakheart set are my faves and i always love creating happy secens with them!
First of all i stamped all the images with memento black ink, i colored them with copics and die cut them with all the coordinated dies.


I also added lots of images from the Teacher's Pet set and the speech bubbles are from the Whatcha Sayin' one.
I created my card base out of some white cardstock and i masked the bottom to create a light green background with the Twisted Citron Oxide ditress ink, then i die cut the Thanks script out of black cardstock.
I also die cut a stitched banner and stamped my sentiment. After that i glued down all the elements with a combo of liquid glue and foam adhesive.


Finally i added some sparkling sequins by Pretty Pink Posh to fnish my card.
I also decorated my envelope this time, i placed the Numicon stencil on the back, masked the bottom using the memo tape and sponged the same distress ink used before on top.
It's a super fun effetc and it takes such little time :)

Hope you like my card+ envelope set and thank you so much for stopping by today!

Please enjoy my Cardmaking Adventure on * Instagram*! I'll be posting all my little cards,tags and i also can't wait to see all the projects shared in the community! :)

See you soon with another cute project! :)
Have an amazing day! 
franci :)